Group
Subject
Your subject is "".
Teammates
Tutor
Your tutor is .
Your appointment is on .
Part 3 Rules Reminder
Click here to review rules
Before the meetings:
-
Know the subject of your appointment.
You must have read the course modules and prepared the questions you wish to discuss with the tutor. -
Know how to locate the progress of your team.
Take the time to formulate the difficulties encountered and the positive points. Don't wait several weeks before reporting problems. -
Organize a meeting.
Except in exceptional cases, find yourself in the same place. A suitable place (quiet) with a good internet connection, for the smooth running of your interview.
During meetings:
-
Your presence is mandatory at all meetings.
Any absence must be justified to your tutor before the meeting in the Slack channel of your group. -
Your camera must be on.
The tutor is there to accompany you synchronously, not to talk to an avatar. -
Behave like a professional.
Adopt an employee posture in a company in all circumstances: holding in front of the camera, appropriate language, listening skills, correct clothing. -
Lead this project in good spirit.
Your participation in the meetings is mandatory and is part of the course. You are not a cruise passenger. Remember to react to the comments made to your group but also to interact with the other groups present.
When the tutor gives the speech, everyone must speak! -
Take advantage of your appointments collectively.
You must divide up the roles: designate as many "scribes" as necessary for each meeting. It is mandatory to write a group interview report and post it in the group channel at the end of the meeting.
Outside of meetings:
-
Collaborate with the tools at your disposal:
-
Slack:
The group communication must be done on Slack in your group channel.
→ If you discuss elsewhere, your tutor cannot accompany you, it is a waste of time, resources and especially advice.
→ Make reports and post them on Slack to get feedback from your tutor.
→ Individual maluses will weight your final score according to your participation.Any student who is not on Slack at the beginning of Part 3 will be graded 0 for Part 3.
Any student who does not participate in the Slack channel of their group will be graded 0 for Part 3.
-
Zoom:
You can use Zoom in group at any time to chat in video and share your screens: type/zoomin your Slack group channel, a button will appear in the channel to join a Zoom room.When launching a Zoom room for the first time, you will have to validate your account by clicking on the "Authorize Zoom" link, then connect with SSO ("Sign in with SSO").
→ In the field "Your company domain", enter "em-lyon".
→ Finally, authenticate on the emlyon portal.
-
-
Be there for others.
Reactivity towards your tutor and your collaborators on Slack is essential. Put yourself in the shoes of a professional who leads a project as a team. -
Document
You must constantly document what you are doing. Keep as much record as possible of the exchanges and work done so that you can analyze what worked in the project and what didn't.
Your weekly goals
- Analyze your problematic, and define your persona and context
- Find two different solutions, that uses two different supports
- Find and test several tools or methods for your technical parts
- Build two prototypes in preparation for next week's user tests.
Why start by prototyping?
If talking about a project can be useful, there is nothing better than materializing it. Prototyping quickly allows you to see the quality of an idea and/or the pain points for its realization. We don't expect from you an industrial prototype or even working applications but rather a quick materialization that allows you to test your proposals.
Phase 1: Prototype, is a creative time based on the skills and explorations you have already made during the previous parts of this course.
This is a team activity!
Although the work is collective, the evaluation will be individual and mainly based on your involvement in the project and in the group's dynamic!
Brief
This week, you will have to find two answers to your problematic.
By working on different solutions for the same problem, we hope that you will think outside the box and don't rush straight to the first naive/obvious solution.
For the same reasons, we want your two projects to be based on two different mediums among this list:
💻 A computer
Your project is meant to be used mainly on a computer (laptop or desktop), it is integrated on a dedicated website, a browser extension, a dedicated software, etc. (examples: Remove.bg, a Google Experiment, LanguageTool).
📱 A smartphone
Your project is meant to be used mainly on a smartphone, using a dedicated mobile app or mobile website. (examples: Google Lens, Foodvisor).
🤖 An embedded interface
Your project is meant to be used mainly on a dedicated device, any use of AI in an interactive terminal, a robot, a connected mirror, an industrial machine, a self-driving car, etc. (examples: Microsoft Hololens, Tesla Autopilot)
Keep in mind that you will have to prototype these solutions during Phase 3: Iterate… maybe this rocket idea is a bit too ambitious! This is why you will test several tools and technologies, in order to find the perfect fit for your project!
But on the contrary don't aim too low, if you have a great idea for adding a feature on a self-driving car you might be able to make a demonstrator using a computer.
Assignments
This week's assignment is to fill the page Phase 1: Prototype on Notion and meet with your tutor.
There is no submission boxe since you already submitted your Notion link on the introduction page of Part 3.
For this phase, you have two goals:
- Defining two proposals
- Prototyping these two proposals
1. Define two proposals
Based on your individual explorations from part two and the given subject, imagine together as many project proposals that you can. You're free to imagine anything as long as your project includes an AI tool:
- Focus on quantity: write down all the ideas that come to you
- Withhold criticism: do not make value judgments and treat all proposals with equal interest
- Welcome unusual ideas: ideas that seem crazy at first sight are sometimes the bests!
- Combine and improve ideas: work by associations of ideas and try to unroll the thread of your thoughts as far as possible
Make a list of ideas for your projects in your group channel, and you'll discuss them with your tutor during first meeting.
Discuss these proposals and select two proposals (based on two different mediums from the previous list) you want to explore together:
- Choose fun ideas that you like, you will work on them for 4 weeks!
- Rank your proposals according to their relevance to your subject
- Do not rush to ideas that seem simple! Ideas that are more complex at first sight often offer more possibilities
- Make sure that you will be able to materialize your projects during week three using makers' lab resources and/or tools that you know. Test and explore several tool options, find the thing that will work for you and your project.
What do we mean when we say test and explore resources? First, try to think about what you need : you need a specific model, which one would you use? For instance, do you need to use PoseNet, GPT-3 or a completly different one? do you need a voice-activation? should you be able to embed it somewhere? etc.
Then, test several resources in regards to your needs, write down the pros and cons. And based on that research, you'll be able to find the perfect fit for your project!
Next week, during Phase 2: Test, you will have to test these two projects with potential end-users. Keep that in mind when defining your personas. Will you be able to book an interview with three of them?
Once you have two project proposals that you like, define actors, contexts, features, usage scenarios, Benchmark, Resources on Notion, you will find later in this page a tutorial.
Notion is a real-time, multi-platform workspace. It means you can write notes with other people on your desktop, tablet, or even on your smartphone. See below in the Tools section our tips to use it perfectly!
Finally, think about all the ethical implications of your projects. We included on your Notion page the same template that was used for the Ethics of AI assignment. Please fill it for this new subject.

2. Prototype your two proposals
By now, you should know a lot of different tools to quickly prototype (and build!) your projects. Keep in mind your next week's goal: test your projects with users. Your first objective shouldn't be to build something complicated or shiny. Make something that users can test to visualize how they will use your products, and give feedback on what they like or not.
Start by asking yourself what are the key features of your project and how you will be able to make a wireframe of your app or device.
Example:
If you want to make a pedestrian detection for a smart-driving car, you can make a drawing of how a detected person would be presented to the driver (or use Figma/Photoshop to do it digitally).
During Phase 3: Iterate you will be able to make a demonstrator using what you've learned during Part 2: Computer Vision (no need to build a car to demonstrate this feature!)
Tools
This section is made to help you understand the basic concepts of interface's design and how to use efficiently and quickly these three softwares:
-
Notion, the place where you are writing everything down, it is the medium for your evaluation.
Click here for more details on
Notion First thing first, all along this Part 3, you will fill a Notion template we made for you. To help you make great documentations here is a video explaining the basics needed for the next four weeks:
Use
/to choose the type of block you want to create.You can drag and drop your blocks to rearrange your pages.
Don't hesitate to use bold type to highlight your ideas.
Add media to your pages to make them more impactful.
-
Figma, a professional tool to prototype application's interface.
For 💻 Computers or 📱 Mobile projects, use Figma to create wireframes, don't spend too much time on your User Interface, focus on User eXperience and how your service will be used (refer to what you've learned during Designing with Web)
Click here for more details on
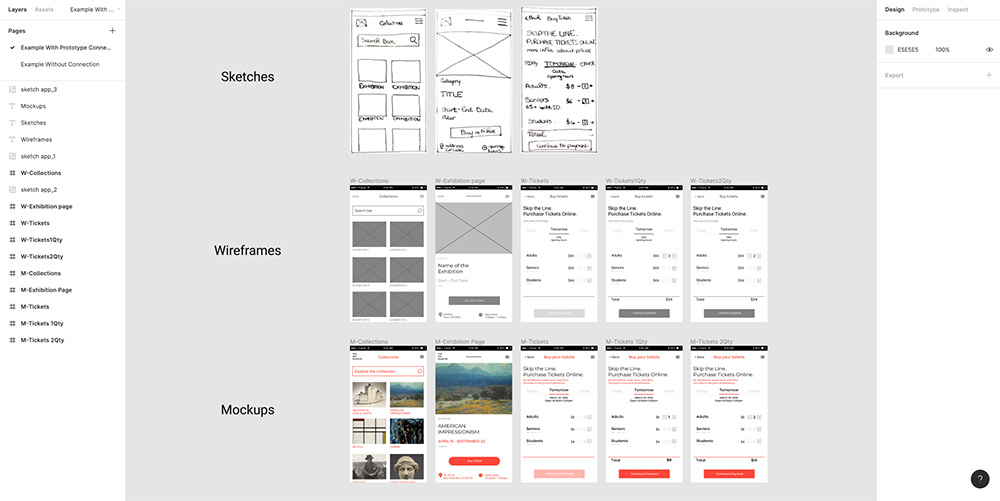
Figma Let's pursue with Figma, the dedicated tool to build your wireframes then your mockups! By the way, what are they? What is the difference between these two?
What is a wireframe?
- Wireframes are simple black and white layouts that outline the specific size and placement of page elements, site features, conversion areas and navigation for your website.
- They are devoid of color, font choices, logos or any real design elements that take away from purely focusing on a site’s structure.
- We often say that they are much like a blue print to a home, where you can easily see the structural placement of your plumbing, electrical and other structural elements without any interior design treatments.
Nick HAAS,
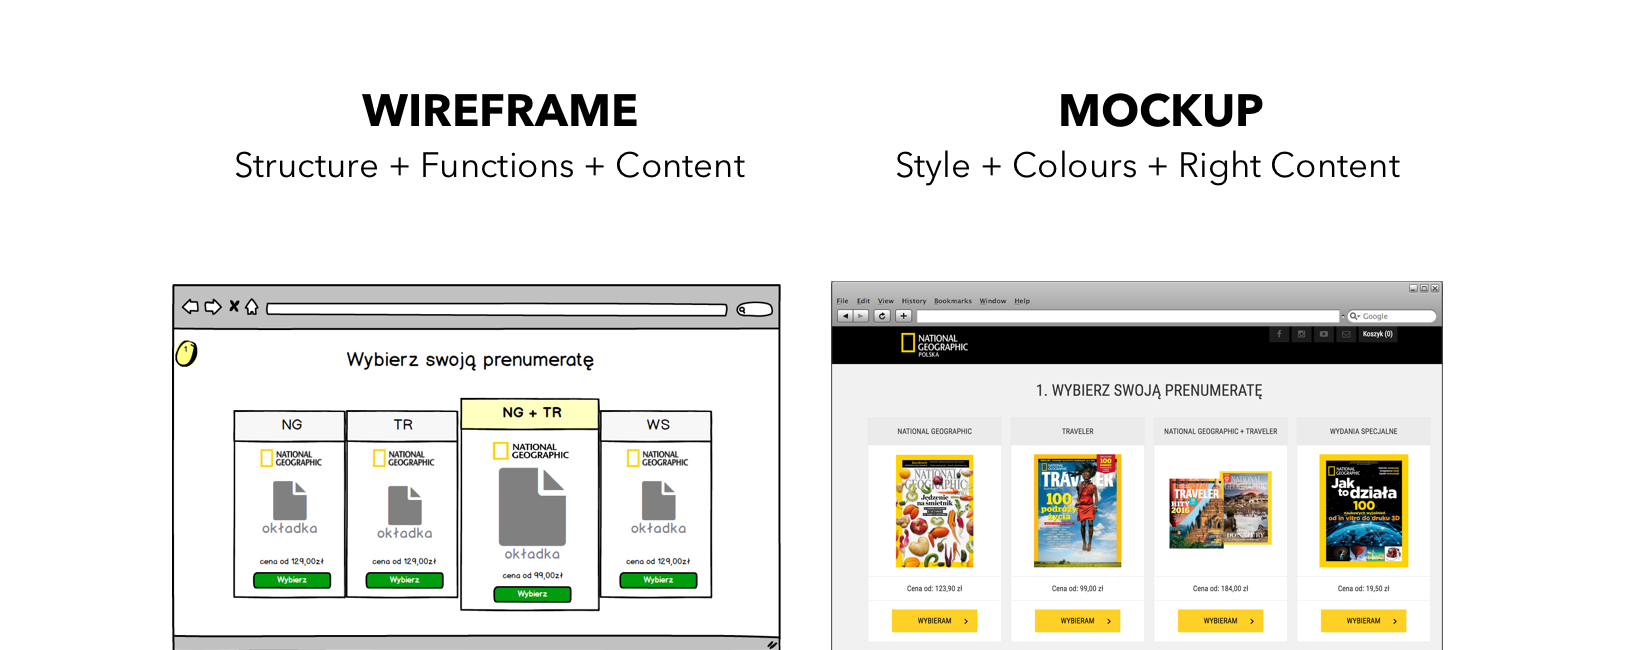
What Is a Wireframe? 7 Reasons Why Wireframing Is Important In Web DesignWhat is the difference between a wireframe and a mockup?
- A wireframe is a simple black and white layout that outlines the specific size and placement of page elements, site features, conversion areas and navigation for your website. It has a very low fidelity representation of the final outcome of your digital product.
- A mockup is a visual demonstrator of your concept that will allow you to easily get end-users feedback. They provide a medium-fidelity representation of your projects.
![Wireframe and mockup comparison]()
Along your projects definitions, you're going to create wireframes for each of your projects using Figma, the all-in-one UX/UI solution for designing websites, mobile apps, and more. Using Figma, you can design, prototype & collaborate all in the browser.
A User Interface (UI) is the space where interactions happen between human (users) and a machine. Generally, the goal of user interface design is to produce a user interface which makes it easy, efficient, and enjoyable (user-friendly) to operate a machine in the way which produces the desired result. This generally means that the user needs to provide minimal input, and that the machine minimizes undesired outputs.
The "User eXperience" refers to the emotions and attitudes a user encounters when using a product (or interface). The goal of UX design is to make this experience as easy, practical and eventually as delightful as possible. UI and UX are closely related: UI/UX designers tackle both concepts when designing user interfaces.
Start by creating your Student Account on Figma. Make sure to use your @edu.em-lyon.com or your @edu.emlyon.com e-mail adress, it will provide you a Student Account without sharing limitations. Then, validate your Student Account.
See the video below in order to be able to collaborate with your team.
See this article on Figma for more about your Student Status.
Now that your Student Account is created and validated, and before starting your wireframes, watch this tutorial to discover the basics of Figma:
Watch out, in the video above, you see the realization of a mockup. You will have to produce a mockup for the design phase. For the current phase, start with a wireframe. A paper wireframe is produced in the video, you have to do the same exercise but on Figma directly ✏️ 💻
You're finally ready to create a bare minimal app/website for each of your projects to describe how, from a home screen, your users would access the most important features of your service with as few screens as possible (e.g. for Uber, this feature should be "how to order a driver").
Figma Community shares hundreds of files to design faster with lo-fi mockups, user flows, simple prototypes, and diagrams. To help you quickly prototype, duplicate this Lo-Fi Wireframe Kit with over 100 wireframing components, and copy elements from this kit to create your wireframes.
Do not try to integrate graphic resources (images / fonts / …) during this step but focus on users scenarii. Have a look at the Figma project below (you can click on it).
Don't wireframe the sign in/sign up features, pretend your user is already identified on their homepage and focus on the main features of your services.
Collaborating on your Wireframes
Figma allows to share your project with anyone. You just have to click on the "share" button on the top right corner of your window, and share the link with edit rights with your team and tutor .Here is a list of useful resources to help you create these wireframes:
- How to wireframe (must see)
- What makes a good wireframe?
- I ♥ wireframes, a collection of wireframes
- Figma Ninja is a game-like experience to learn the basics of Figma
- Figma's short tutorials on Youtube
- Figma's Help Center for all your Figma related questions
- Physical tools, like scissors and cardboard.
For 🤖 Embedded interfaces! You will have to make at least a physical representation of your project using cardboard, paper, wood, 3D printing, etc. If your device includes a screen, you will also need to prototype it using Figma. Ask your tutor for recommendations!
Evaluation criteria
- For each of the two projects (9 pts each = 18 pts)
-
Project Definition (3,5 pts)
The problematic you found is relevant and your two proposals are potential solutions to tackle it.
Your Notion page for this phase is filled correctly and make sense. -
Prototype Description (3,5 pts)
You have correctly identified the tools you will need and your Notion page is filled properly.
Your prototype is UX focused. -
Ethics (2 pts)
You have identified the populations that could be negatively affected by your project and you have proposed coherent solutions to these risks.
Your Notion page is filled correctly. - Communication (2 pts)
You communicated professionnaly and efficiently with your group members and your tutor both on Slack and during the meeting.